You can readily buy cans of coconut cream and milk from the supermarket but the taste of fresh coconut cream and milk is far superior, it has a lovely aroma and a delicacy of flavour that justifies the time and effort required to produce it.
You definitely notice the difference when you use fresh coconut milk in your dishes.
To make coconut cream and milk, you need a coconut.
There are a few things to take into account when selecting a coconut to ensure that you get the best one.
- You should choose a coconut that feels heavy for its size as this indicates that there is a good amount of flesh inside the coconut.
- When you shake the coconut, you should hear a pronounced sloshing sound from the coconut water inside, this indicates that it’s fresh. A dry coconut is old or damaged. Out of all the coconuts at the store, try to find the one that seems to have more water inside than the rest.
- Check the eyes of the coconut, they should not have any mould around them (this is a sign that there may be mould growing inside the coconut) and they should also be quite firm.
- Make sure there are no cracks on the shell, it should be intact protecting the meat inside.
- Coconuts should be stored in a cool place or in the refrigerator.
So you should basically be standing in front of the coconut stack at the store, picking up each coconut and feeling its heaviness, and then shaking it about, listening for water inside.
I picked a happy looking coconut.
Hold the coconut in the palm of one hand and in the other hand, you need to use the back of big heavy cleaver to crack down on the coconut around the centre, rotate the coconut around as you whack it with the cleaver (warning: as the coconut shell starts to split, it will spit out coconut water at you, so it is best to do it over the sink).
You should end up with two bowl shaped pieces, wash the insides of the coconut halves with water. Then you need to get the flesh out. I didn’t have the proper tools (ie: a coconut grater), so I used a zester…this took a long time (it’s like digging a hole in the ground with a spoon instead of a shovel). I looked around for something else to get the flesh out and found a melon scoop. This was slightly better, as I was able to get more flesh out in a shorter amount of time.
Once you have removed all the flesh from the coconut, put the flesh into a food processer/blender with around one cup of warm water and pulse a few times. This extracts the oils and the aromatic compounds.
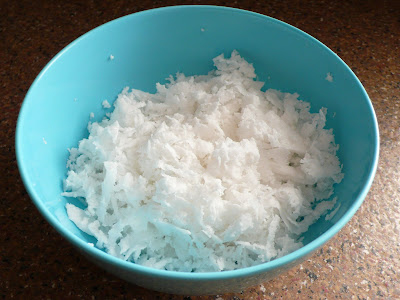
Then extract as much of the coconut cream and milk as possible by squeezing through a muslin into a glass bowl and leave to separate for at least 20 minutes. You will also be left with desiccated coconut which you can save and use for baking.
As you can see in the picture below, the cream is the thicker opaque liquid that separates and floats on top of the thinner liquid, which is the coconut milk.
Note: It is best to use the coconut cream and milk within a few hours. They can be kept refrigerated but the cream can sour within a day or two. To arrest this process, the coconut cream and milk can be simmered for a minute, this is, in effect, pasteurization.


oh la la coconut milk! I saw this being done on poh's kitchen (yes i downloaded it and its sorta annoying after watching 4 episodes). I might try it one day, my boyfriend LOVES thai cooking. how long did it take to with the zester? I'll probably try a big old stick if I can find one eep.
ReplyDeleteHey Janelle! I do not recommend using a zester, you can't really grate much coconut out. All up using the zester and melon scoop it took me maybe an hour. I am gonna look for a coconut grating tool.
ReplyDelete